 This beautiful felt garland arrived for me in the post today - Thank you my Dear one !
Cupcakes and Hearts, I can think of no sweeter combination....

 This beautiful felt garland arrived for me in the post today - Thank you my Dear one !
 begin by crocheting a flat circle,* until it is the diameter of the crown of your head (approx 15 -20cm)


 I didn't use a specific pattern for the hat, but if you know the principles of crocheting 'on the round' it is quite simple. I used a single crochet stitch, which I thought gave a nice natural textured weave, and made it long enough to roll up a brim at the bottom, and finally made a short stalk on the top.
Jill phoned me today to thank me for the hat I had posted to her, and I was relieved to see it fitted.
 I have a big thing for hearts - their curvy shape, symmetry, lush red colour and the country cottage feel they can lend to a home. If you were to come round to my house, you would notice them dotted in practically every room.
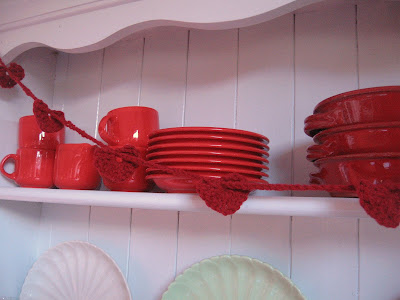 I love this heart garland I made to decorate my dresser at Christmas time, so much so much it never came down. Click here for this great pattern on the blog Suzie's Stuff.


 I have been trying my hand at a pattern for a 3d crochet heart, and I have to admit, I am finding it tricky to get my heart symmetrical!
 There are many patterns on the Internet for crocheted hearts, but I found this one the simplest to follow at Instructables. A bit more practice I fear before the 14th!

 I have found it a challenge to find crochet patterns for nice, light cardigans that also flatter when worn and so have found myself returning to this one time and time again. This is the 3rd time I have made this cardigan, and as all were made using very different yarns and colours, they have all turned out differently. The pattern is called Chevron Lace Cardigan, and is published on 'Without Seams' blog (very inspiring and talent soaked!). I found it via Ravelry, it's probably the most popular cardigan pattern on Ravelry, and no wonder as it is such a breeze to make. It's a top-down style pattern which means the garment is made in one complete piece , top downwards.
I had planned to make this one longer in length and in the sleeves, but unfortunately ran out of yarn, but I reckon it'll still come in use for layer, wearing on top of dresses etc..
 Oh, yes and the sun was shining today when I took these photos - Bliss! roll on Springtime (of course we need the Snow to melt first!) and new cardigans!!!


 I have a friend who lives on the other side of the world from me in Australia and has recently given birth to a little boy. It's summer over there right now, so cosy hats and jumpers were out of the question, so I have crocheted a light cotton blanket and a little Koala bear with the same cotton to accompany it.


The blanket was very easy and quick to make, using a V-Stitch (dc, ch 1, dc in same stitch) for the body of the blanket and a simple Picot edging. I used a pattern from Amigurumi Two! (Ana Paula Rimoli) for the small Koala teddy.
Pattern for V-Stitch baby Blanket
Ch 88.
Row 1 (Dc, ch 1, dc) in 5th ch from hook, [skip 2 ch, work V-st in next ch] across to last 2 ch, skip 1 ch, dc in last ch – 28 V-sts and dc at each end of row.
Row 2 Ch 3, turn; work V-st in each ch1-space across, end dc in top of turning chain.
Repeat Row 2 for V-st pattern until there are a total of 34 rows; ch 1 (instead of ch 3), turn. DO NOT FASTEN OFF.
BORDER
Sc in each dc and ch1-space across, end 3 sc in last dc; rotate to side, sc evenly along side edge, 3 sc in first ch of foundation ch; sc in each ch across, 3 sc in last ch; sc evenly along rem side edge, end 2 sc in top of last row turning chain, join with slip st to top of first sc.
Picot Edging
(Ch 2, slip st in second ch from hook, skip 1 sc, slip st in next 2 sc) around, adjusting for corners and end of rnd.
Fasten off. Weave in ends.
 We have been doing a lot of lounging lately, mainly due to the lousy weather and forced confinement within the house. We have all been trying to embrace the situation, snuggling up, watching movies, playing board games etc.. My boys love to lie on the floor in front of the fire, so when passing through Edinburgh at Christmas time I picked up some cheap fabric from Ikea to revamp some old abandoned floor cushions. I must admit I am rubbish on the sewing machine, too slap-dash and impatient, so I opted for an envelope style (think pillowcase) cushion cover to avoid having to worry about adding zips or buttons. Heres a quick tutorial of how I made them:-
 The cushion cover apparently should be the same size as the pad, to give a nice fit. Cut the length of fabric so that the ends overlap envelope style when folded over the pad.
Step 2 - hem each end


As you can see the 2 ends over lap here( right sides facing). the idea is to sew right up each side from top to bottom - simple!
Step 4:- Sew up and trim

Because my fabric was a bit too wide for the cushion pad, I sewed generous hems on each side and then trimmed them down for neatness.
Step 5 - Un-inside out Cushion cover and insert your pad

ok, a bit slap dash, but the end result is great. So easy I made another...


